The Vickers hardness test was developed by Smith and Sandland at Vickers Ltd. in 1924 to provide a reliable alternative to the Brinell hardness test for the measurement of material hardness. Compared with other hardness test methods, the Vickers hardness test is characterized by relative ease of operation and its calculation process is not limited by the size of the indenter, which allows the same indenter to be used for a wide range of different materials without taking into account differences in hardness values.
In all hardness testing methods, the core purpose is to observe the ability of an unknown material to resist plastic deformation, and the Vickers test is no exception. It is applicable to almost all metallic materials and has an extremely wide range of applications in the field of hardness testing. Vickers hardness values are expressed in Vickers Hardness (HV) or Diamond Prism Hardness (DPH). During the test, the indenter needs to have a specific geometry, usually a positive quadrangular diamond indenter, which ensures that the indentation, regardless of its size, is geometrically similar to that of the indenter and that the indentation has easily measurable, well-defined boundary points. At the same time, the indenter must be extremely strong to resist deformation during the test itself. Vickers hardness values are usually expressed as “xxxHVyy”, e.g. “350HV20”, where “350” stands for the hardness value, ‘HV’ stands for the hardness scale, and “HV” stands for the hardness value. “HV” denotes the hardness scale (Vickers) and ‘20’ denotes a test force value of 20 Kgf. If the holding time is outside the range of 10s to 15s, the expression "xxxHVyyy/zz If the holding time is outside the range of 10s to 15s, the expression “xxxHVyy/zz” is used, e.g. “350HV20/25”, where “25” indicates a holding time of 25 seconds.
It is important to note that Vickers hardness values are generally independent of test force values, and it is possible for Vickers hardness values to remain consistent for the same material over a range of test forces from 500gf to 50kgf. Vickers hardness testing plays an extremely important role in materials analysis, quality control of production processes and evaluation of research and development results. Hardness is essentially an empirical value, and for many materials it is closely related to tensile strength, as well as being a visual representation of a material's wear resistance and ductility. In Vickers hardness testing, the distance between neighboring indentations should be greater than three times the diagonal length of the indentation in order to avoid interactions between different test hardened zones.
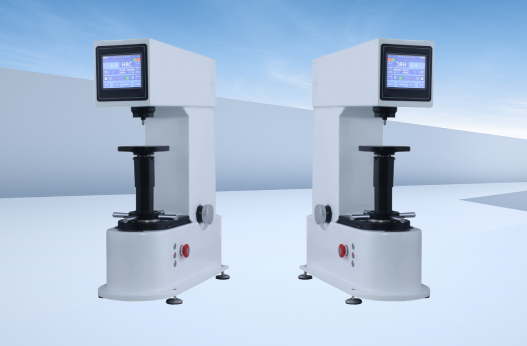

The Rockwell hardness test is one of the most widely used hardness test methods in the world, according to ISO 6508 and ASTM E-18. It has a wide range of applications, covering almost all types of metallic materials and, under certain conditions, some plastic materials. Compared to other hardness testing methods, Rockwell hardness testing requires relatively little preparation of the specimen surface, which makes the testing process quicker and easier, and for this reason it is widely used in many industries around the world. The biggest advantage of this test method is the speed of the test, which shows the measurement result immediately at the moment the indentation is completed.
The basic operation of the Rockwell hardness test is as follows: First, an initial test force, typically 98.07N (equivalent to 10kgf), is applied to calibrate the zero or reference point. Next, a main test force is applied, and the sum of the initial test force and the main test force is the total test force required. The total test force is available in a variety of standards, such as 588.4N (equivalent to 60kgf), 980.7N (equivalent to 100kgf), 1471N (equivalent to 150kgf), etc., and the specific value will be selected according to the hardness range of the material to be tested and the test requirements. After the main test force is applied, it is held for a preset time, usually 10 - 15 seconds, to allow sufficient elastic and plastic deformation of the material to ensure the accuracy of the measurement results. Afterwards, the main test force is removed, but the initial test force is retained, and the Rockwell hardness value is obtained by measuring the change in depth relative to the zero or reference point. Rockwell hardness is classified according to different scales as HRA, HRB, HRC, etc. Different scales are suitable for materials with different hardness ranges, e.g. HRA is suitable for the measurement of high hardness materials (e.g. cemented carbides), HRB is suitable for the measurement of softer metals (e.g. annealed copper alloys), and HRC is suitable for the measurement of moderately hard to highly hard metals (e.g. hardened steel).

Brinell hardness test results play an important role in the quality control of modern industry, and are often used as the basis for acceptance of commercial shipments and as one of the core indicators of quality control in the production process. The test results are closely linked to the properties of the metal material, such as ductility, tensile strength and wear resistance. Through the Brinell hardness test, it can be inferred to a certain extent that the performance of metal materials in practical applications.
Brinell hardness testing belongs to the category of indentation hardness testing, the whole operation process mainly contains two key steps:
Indentation operation: the choice of a specific diameter indenter, generally used indenter diameter 10mm, 5mm and other specifications (the actual application will be based on the material characteristics and test requirements to choose the appropriate diameter). The indenter is pressed vertically into the surface of the specimen under a precisely controlled test force. The test force is adjusted according to the material, e.g. for softer metals the test force may be around 980.7N (equivalent to 100kgf), for harder metals the test force may be as high as 2942N (equivalent to 300kgf). After the test force has been applied, it is held for a period of time, usually 10 - 30 seconds, to ensure that the indentation is stabilized, after which it is smoothly unloaded.
Calculation of hardness: After the indentation operation is completed, at least two diameters of the indentation are measured perpendicular to each other using a specialized measuring tool. By calculating the average of these two diameters, the Brinell hardness value is obtained by applying a special formula (where Brinell hardness value, test force, indenter diameter, average diameter of the indentation). In order to increase the efficiency of the calculation, it is also possible to use a chart based on this formula to quickly obtain the Brinell hardness value by looking up the chart.

The Knoop hardness test differs from the Vickers hardness test in that the shape of the indentation is asymmetrical. When testing with the Knoop scale, especially at test forces of 200 gf or less, changes in hardness values can be more clearly demonstrated.
Although a test force of 500 gf provides a hardness conversion relationship between Knoop results and other hardness scales in the ASTM standard, Knoop hardness testing is not normally used to define macro-hardness. As a general rule, the Knoop test force is usually no more than 1000gf, except in special cases or for specific materials where higher test forces (such as 2kgf and 5kgf) are required, and these higher test forces are used with the expectation of obtaining a more significant change in hardness.
The unique feature of the Knoop diamond indenter is that its long diagonal length is much greater than its short diagonal length. Compared to the Vickers indenter, the Knoop indenter is better able to capture hardness variations over short distances, a characteristic that gives it a significant advantage when measuring the microscopic hardness distribution of a material, and in particular, when investigating localized hardness variations in a material.
However, the Knoop hardness test requires a high degree of preparation of the specimen, and the success of eliminating damage caused during specimen preparation will directly affect the accuracy of the test results. This problem will become more prominent when the test force is lowered, so the surface of the specimen needs to be finely processed before performing the Knoop hardness test to ensure the reliability of the test results.

Copyright @ 2024 Anhui Fuxiao Intelligent Technology Co.